Upgrading or Installing
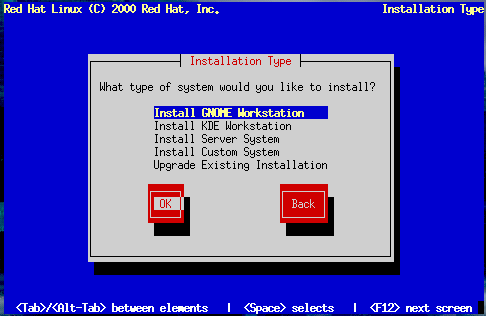
The Installation Type dialog (Figure 10-11) presents you with five choices, described below.
Install GNOME Workstation -- Install on a system that will be used primarily as a workstation. Load the GNOME GUI and configure the system to start GNOME when the system boots. The installation program deletes all data in any existing Linux partitions, decides how to partition the disk for the new version, and chooses which software packages to load.

Warning Do not choose this method if you're sharing a disk with Windows NT; if you do, you will be unable to boot Windows NT. LILO will write over NT's boot loader and you will be unable to boot NT. You must perform a custom-class installation and configure LILO so that it is not installed on the Master Boot Record (MBR).
To create a dual-boot environment on a system that currently has NT, you must install LILO on the first sector of the root partition, not the MBR. Please be sure to create a boot disk. In a case such as this, you will either need to use the boot disk, or configure the NT system loader to boot LILO from the first sector of the root partition. Be sure to check out http://www.linuxdoc.org/HOWTO/mini/Linux+NT-Loader.html for more information on setting up LILO and NT.
Install KDE Workstation -- Install on a system that will be used primarily as a workstation. Load the KDE GUI and configure the system to start KDE when the system boots. The installation program deletes all data in any existing Linux partitions, decides how to partition the disk for the new version, and chooses which software packages to load.

Warning Do not choose this method if you're sharing a disk with Windows NT; if you do, you will be unable to boot Windows NT. LILO will write over NT's boot loader and you will be unable to boot NT. You must perform a custom-class installation and configure LILO so that it is not installed on the Master Boot Record (MBR).
To create a dual-boot environment on a system that currently has NT, you must install LILO on the first sector of the root partition, not the MBR. Please be sure to create a boot disk. In a case such as this, you will either need to use the boot disk, or configure the NT system loader to boot LILO from the first sector of the root partition. Be sure to check out http://www.linuxdoc.org/HOWTO/mini/Linux+NT-Loader.html for more information on setting up LILO and NT.
Install Server System -- Install on a system that will be used primarily as a server. The X Window System is not configured and no GUI starts when the system boots. The Installation program deletes all data in all existing partitions of any kind, decides how to partition the disk for the new version, and chooses which software packages to load.
Install Custom System -- Perform a custom installation. You make all decisions regarding disk partitioning and initialization, which software packages to install, and how to configure the X Window System and the user interface.
Upgrade Existing System -- Upgrade an earlier version of Red Hat Linux (2.0 or later) without deleting any existing data. The installation program updates the modular 2.2.x kernel and all currently installed software packages.
Upgrading
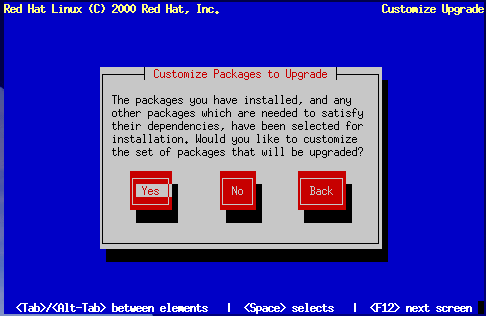
If you choose to upgrade and the installation program detects more than one installed Linux version on the system, you'll be asked which version to upgrade. After you indicate this, or if there's only one installed Linux version on the system, the installation program probes your existing system to determine which software packages require updating and presents the Customize Packages to Upgrade dialog (Figure 10-12).
If you answer No, the installation program starts upgrading existing packages.
Answer Yes if you want to add to or remove items from the list of individual packages to be upgraded. The package selection dialog is seen in the section called Selecting Individual Packages. The upgrade starts when you finish making your changes.
 | Please Note |
|---|---|
Some upgraded packages may require that other packages are also installed for proper operation. The upgrade procedure takes care of these dependencies, but in doing so it may need to install additional packages which are not on your existing system. |
The upgrade process preserves existing configuration files by renaming them using a .rpmsave extension (e.g., sendmail.cf.rpmsave) and leaves a log telling what actions it took in /tmp/upgrade.log. As software evolves, configuration file formats can change, so you should carefully compare your original configuration files to the new files before integrating your changes.
The next dialog you'll see is Figure 10-40. This dialog remains on the screen until the upgrade is complete.
Installing
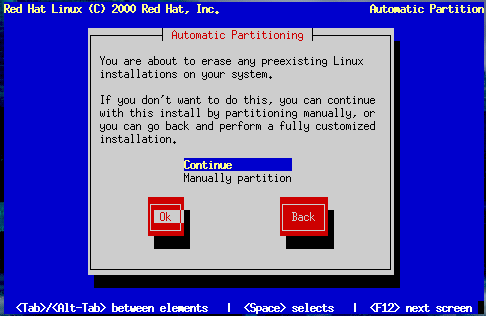
If you choose a workstation- or server-class installation, Figure 10-13 appears.
If you select Continue and press OK, the installation program partitions your disk and decides which software packages to install. Next, you'll see the Hostname dialog explained in the section called Naming Your Computer.
If you select Manually partition or choose to perform a custom-class installation, Disk Druid will begin. The disk partitioning dialogs described in the next section will appear, showing you any current partitions on your system. It is up to you to indicate the partitions and mount points to be used for installation of this version of Red Hat Linux.
 | Caution |
|---|---|
Installing Red Hat Linux over another installation of Linux (including Red Hat Linux) does not preserve any information (files or data) from the prior installation. Make sure you save any important files! If you are worried about saving the current data on your existing Red Hat Linux system (without making a backup on your own), you should consider performing an upgrade instead. |


